If Espresso Profiler stated 'Your computer could not connect to your Rocket R60V.'
that means there is a block of some sort between your computer and your R60V.
If you have a network firewall or virus scanner, it is possible your app is being blocked
before it can speak with your R60V. Please check your reports for those tools.
If you have a newer Mac laptop or desktop computer, it is likely your wi-fi is not fully recognizing your R60V's (slightly older) wi-fi network.
Apple might fix that issue soon (it's not a problem for iPhone, iPad or older Macs). Alas, until then, we need to take extra steps to connect a newer Mac computer to RocketEspresso.
WATCH OUT!
Your internet wi-fi expects the 'Using DHCP' option.
When you switch back to your internet wi-fi,
you will need to set the 'Configure IPv4' option back to:
Using DHCP
or else your internet will not connect.
Ready?
Let's get your Mac linked to your Rocket R60V:
First, connect your Mac wi-fi to your RocketEspresso network.
Open your "Wi-Fi Settings" and click the 'Details...' button for your RocketEspresso network link:

If your Mac shows your wi-fi connection as having 'No IP Address' or a 'Self-assigned IP':

That means your Mac was not able to identify your Rocket R60V's wi-fi network.
We can fix that (but Apple makes it kinda tricky).
Click 'Cancel' on your connection details dialog, then scroll to the bottom of
your Wi-Fi network list.
Click the 'Other...' button (just below your list of wi-fi networks):
The "Add a Wi-Fi Network Profile" dialog will appear. In that dialog, enter:
Network Name: RocketEspresso
Security: select the [WPA2/WPA3 Personal] option
Password: [your RocketEspresso network password]
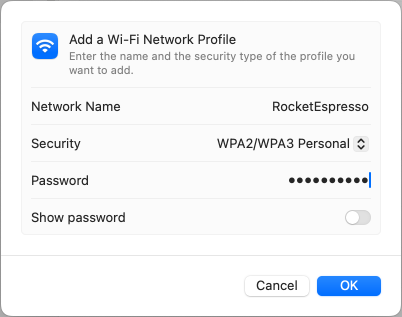
After entering those details, click 'OK'.
Your Mac will connect to that new wi-fi network, but the custom connection needs to be tweaked.
Click the 'Details...' button again for your RocketEspresso network link.
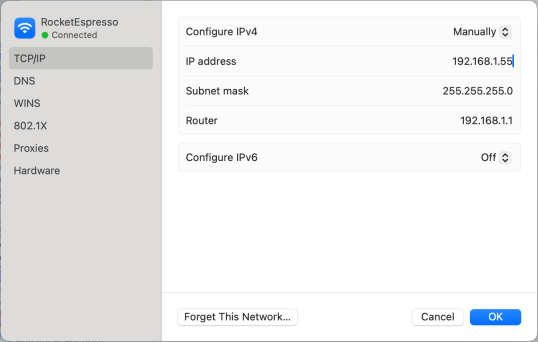
Click the 'TCP/IP' menu option (on the left; see screenshot below), then enter these details:
Configure IPv4: select the [Manually] option
IP address: 192.168.1.55
Subnet mask: 255.255.255.0
Router: 196.168.1.1
WATCH OUT: your internet wi-fi expects the 'Using DHCP' option.
When you switch back to your internet wi-fi, you will need to set the 'Configure IPv4' option
to Using DHCP, or else your internet will not connect.
After entering those details, click 'OK'.
Click the 'Details...' button for your RocketEspresso connection.
You should now see the link is fully connected:
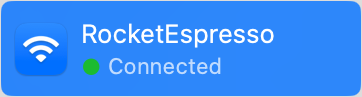
You can now close your Wi-Fi Settings and link Espresso Profiler to your Rocket R60V.
Yes, that's a pain.
I hope Apple fixes their Wi-Fi network compatibility soon.
Wi-fi uses one channel at a time.
If you use wi-fi to connect to the internet, select your usual internet wi-fi network
when you are finished using Espresso Profiler. You may need to switch that network
back to Using DHCP under the 'Details...' button for your network connection:

[your internet wi-fi will have this setting]
You can set up different network 'Locations' on your Mac, and that will allow you to switch between your internet and RocketEspresso without needing to switch DHCP options.
Apple has provided details for network locations on this page:
https://support.apple.com/en-us/105129.
Please send me an email. I'll do what I can to help!